How to Create a 3D Walkthrough: A Practical Guide for Real Estate
Creating a 3D walkthrough involves capturing a property, processing the data into a navigable model, and hosting it for buyers to explore. This guide covers each step, the tools involved, and where AI-guided tours extend the walkthrough into an interactive experience.
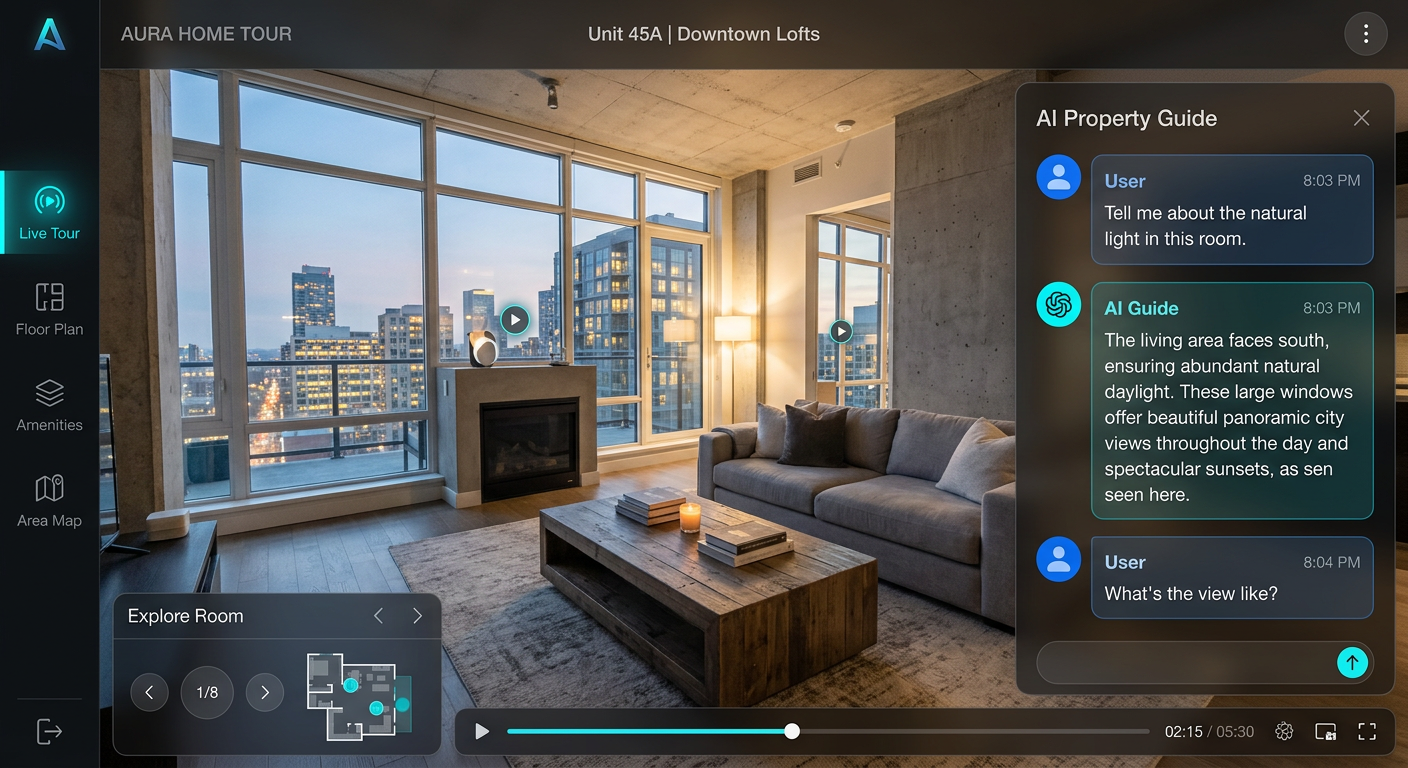
What you need to create a 3D walkthrough
At a high level, creating a 3D walkthrough involves three stages: capture, processing, and hosting. The capture stage collects visual and spatial data from the property. Processing turns that data into a navigable model. Hosting makes the model available to buyers via a link or embed.
Step 1: Capture the property
There are several approaches to capturing a property for a 3D walkthrough:
- Specialized 3D scanners: Professional-grade equipment that captures depth and spatial data with high accuracy.
- Camera-based workflows: Using a standard or 360 camera with software that stitches images into a navigable model.
- Mobile capture: Some newer tools use a smartphone camera combined with AI processing to create basic walkthroughs.
The right approach depends on your budget, the level of detail required, and how many properties you need to capture.
Step 2: Process the data
After capture, the raw data is processed into a navigable 3D model. This step typically uses specialized software — either bundled with the capture equipment or available as a standalone service. The processing time varies from minutes to hours depending on the property size and the complexity of the model.
Step 3: Host and share
The processed model is hosted on a platform that provides a shareable link or embed code. Buyers open the link in a browser and navigate the walkthrough. Most platforms handle the hosting infrastructure, so you do not need your own servers.
Common limitations
- The walkthrough is passive — buyers navigate alone with no one to answer questions.
- Capture requires either expensive equipment or time-consuming manual photography.
- Processing can be slow for large properties.
- The walkthrough does not adapt to individual buyer interests.
Where AI changes the walkthrough
Once you have a 3D walkthrough, the question becomes: how do you make it engaging? AI-guided tours add a conversational guide to the walkthrough. Instead of navigating alone, the buyer interacts with an AI guide that leads them through the property, answers questions, and tailors the experience.
Coming Soon:Augnix is developing a capture-to-experience workflow (Augnix Live) that simplifies creating immersive walkthroughs. In Development. Coming Soon.
Where Augnix Guide fits
Augnix Guide adds the conversational layer to your property walkthrough. Once your property content is ready, Augnix Guide pairs it with an AI guide (Shivangi) who leads buyers through the tour interactively. You do not need to rebuild your walkthrough — Augnix Guide adds the guided experience on top.
Frequently asked questions
How much does it cost to create a 3D walkthrough?expand_more
Costs vary depending on the capture method (scanner vs camera), the size of the property, and the hosting platform. Professional 3D scanning services can range from thousands to tens of thousands of rupees per property. Camera-based workflows are less expensive but may produce lower-quality models.
How long does it take to create a 3D walkthrough?expand_more
Capture typically takes 30 minutes to a few hours depending on property size. Processing can take anywhere from minutes to hours. With Augnix Guide, adding the AI-guided experience layer happens on top of your existing walkthrough content.
Can I add an AI guide to an existing 3D walkthrough?expand_more
Yes. Augnix Guide is designed to add a conversational guide layer to your property content. You do not need to rebuild your walkthrough from scratch.
Related resources
Explore Augnix Guide
Experience an AI-Guided Property Tour with Shivangi.